Reinforcement learning is an amazingly fun application of machine learning to a variety of tasks! I have seen plenty of videos around of reinforcement learning applied to video games, but very few tutorials. In this series (it may take a while and I have not finished the project as I write this article, it may not even work!) we will apply it to a game I love: Balloon Fight, with explanations that will, hopefully, make the reader able to reuse to different games!
In a nutshell, reinforcement learning consists in teaching a computer to act in a environment (here, a game) the best way it can, without having to describe the rules of the environment (the game) to the algorithm. The way it works is that the algorithm will try different behaviors thousands of times and improve every time, learning from its mistakes.
In a more precise way, the game is splitted in a discrete set of steps. At each step the agent (or algorithm) will observe the environment and decide of an action to take (here, a key to press) and observe, again, the environment and the rewards it got from taking the previous action. When the game is over, the agent restarts to play, but with the accumulated knowledge of its previous experiences.
Enabling Python to communicate with the game
What you will need
We will teach our algorithm to play Balloon Fight. More precisely, the Balloon Trip mode (as it will save some efforts, as we will see later).
I have the following directory structure:
.
├── games
│   └── BalloonFight.zip
├── src
│   ├── balloon_trip_environment.py
│   ├── intro.py
│   └── balloon_fight_game_over.png
└── TODO.md
BalloonFight.zipis a ROM of the game.
intro.py and balloon_trip_environment.py will be explored below.
balloon_fight_game_over.png will be created and explained later.
Python packages
Regarding the packages, we will start with Python default packages and pyautogui which enables interaction with other windows. This may have some dependencies, but I trust my reader to be able to fix all of them :)
External dependencies
We will use FCEUX as an emulator.
The starting point (intro.py)
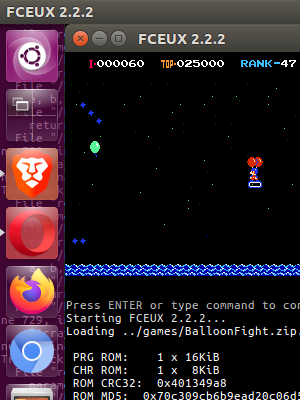
Let’s see how Python can interact with any window on the screen, just like a human being! The script below will:
- launch FCEUX with the game
- press a sequence of buttons (or keys)
- take a screenshot of a region of the screen
import pyautogui as pg
import os
import time

game_filepath = "../games/BalloonFight.zip"
os.system(f"fceux {game_filepath} &")

time.sleep(1)

keys_to_press = ['s', 's', 'enter']

for key_to_press in keys_to_press:
    pg.keyDown(key_to_press)
    pg.keyUp(key_to_press)

time.sleep(2)

im = pg.screenshot("./test.png", region=(0,0, 300, 400))
print(im)
The main things to notice are:
os.system(f"fceux {game_filepath} &")
Note the & at the end of the command. Without it, Python would be “stuck” waiting for the return of os.system(). With this, Python keeps executing the following lines.
pg.keyDown(key_to_press)
pg.keyUp(key_to_press)
There is a .press() method with pyautogui, but for some reason, it did not work with the emulator.
im = pg.screenshot("./test.png", region=(0,0, 300, 400))
Will be able to capture parts of the screen while the emulator is running, therefore allowing Python to “communicate” with the window.
Reinforcement learning
Micro crash course (or the basics we need for now)
An important element in reinforcement learning is the following loop (env refers to the environment, or the state of the game at each instant, while agent will be able to press buttons and interact with the environment).
for episode in range(N_EPISODES):

        env.reset()
        episode_reward = 0

        done = False
        while not done:
            current_state = env.observe_state()

            action = agent.get_action(current_state)

            new_state, reward, done = env.step(action)
Basically, it shows a clear separation between the environment and the agent. For now, let’s just implement the environment.
The environment
For now, we only need to describe the environment in a convenient way. It needs to expose a observe_state(), next(action) and is_game_over(), making sure the agent can continue acting.
import pyautogui as pg
import os
import time
from helpers import fast_locate_on_screen
from PIL import Image


class BalloonTripEnvironment:

    def __init__(self):
        self._game_filepath = "../games/BalloonFight.zip"
        self._region = (10,10,300,300)
        self._game_over_picture = Image.open("./balloon_fight_game_over.png")

    def _custom_press_key(self, key_to_press):
        pg.keyDown(key_to_press)
        pg.keyUp(key_to_press)

    def turn_nes_up(self):
        os.system(f"fceux {self._game_filepath} &")
        time.sleep(1)

    def start_trip(self):
        keys_to_press = ['s', 's', 'enter']
        for key_to_press in keys_to_press:
            self._custom_press_key(key_to_press)

    def observe_state(self):
        return pg.screenshot(region=self._region)

    def capture_state_as_png(self, filename):
        pg.screenshot(filename, region=self._region)

    def step(self, action):
        self._custom_press_key(action)

    def is_game_over(self):
        res = pg.locateOnScreen(self._game_over_picture,
                                grayscale=True, # should provied a speed up
                                confidence=0.8,
                                region=self._region)
        return res is not None

    def rage_quit(self):
        os.system("pkill fceux")
        exit()
Some details
The class above is an adaptation of the introduction script, in a more object oriented way. The main detail is the following:
def is_game_over(self):
    res = pg.locateOnScreen(self._game_over_picture,
                            grayscale=True, # should provied a speed up
                            confidence=0.8,
                            region=self._region)
    return res is not None
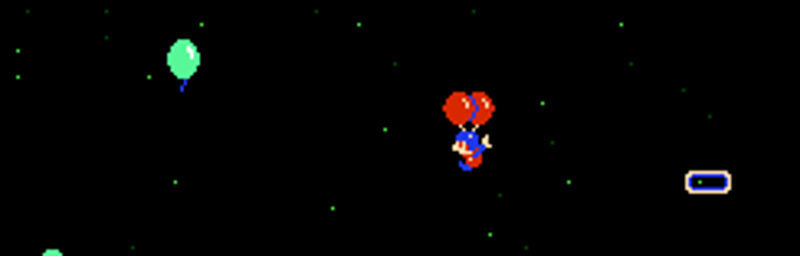
It looks for the image below to make sure that we are not seeing the “Game Over” screen.

Watch it in action
Let’s test it! f is just the A button of the NES, it will simply enable the balloon guy to go up. For the loop, we will test that the game is not over, and then the player will press the A button.
if __name__ == "__main__":

    env = BalloonTripEnvironment()

    env.turn_nes_up()
    env.start_trip()
    print("Started")
    is_game_over = False
    i = 0

    while not is_game_over:
        i += 1
        is_game_over = env.is_game_over()
        env.step('f')


    print("Game over!")

    env.rage_quit()
And tada!
Next steps
We have the environment. Now, we will need to turn it as a matrix that will be used as “features” for reinforcement learning, this will be the topic of the next article. Once achieved, we will be able to jump to the deep learning part!
First issues
Programming without issues does not exist, at least in my world. Though the above works as expected, we notice that during the loop, the button was pressed only four times. After a more careful exam, I noticed that is_game_over() is the bottleneck.
If we want to be able to read the input on the screen, decide of the best action to take, we need to have much (much) more time between two screenshots. This will be the topic of an intermediate post, stay tuned if you liked it :)
Learning more
The following resources (sponsored URLs): Hands-On Machine Learning with Scikit-Learn, Keras, and TensorFlow and Reinforcement Learning: Industrial Applications of Intelligent Agents will provide a good introduction to the topic, in Python, with the libraries I am going to use.